Pest Control: Unsuccessful Treatment Guide | Best Home Pest Control
Pest treatment failed? Discover technical reasons for recurrence, audit protocols, and targeted IPM solutions. Call 937-809-8658 for support.

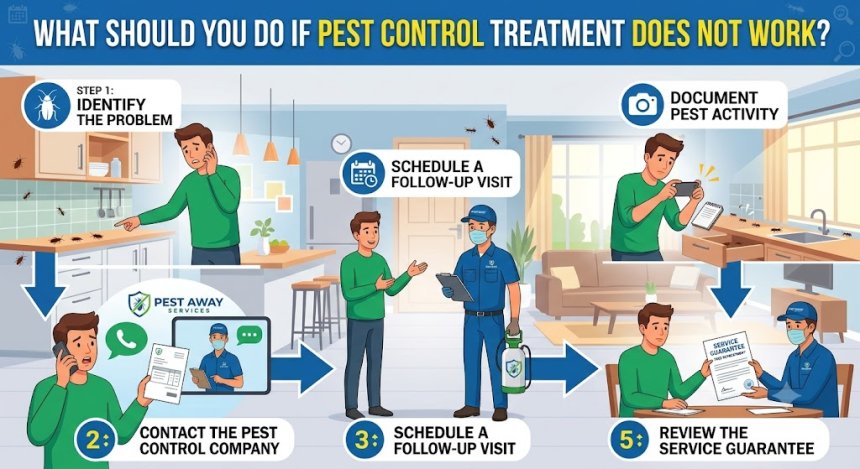
What Should You Do If Pest Control Treatment Does Not Work
When a pest control application fails to resolve an active infestation, the cause is rarely insect resistance alone; it is typically due to incomplete structural exclusion, unaddressed moisture reservoirs, or inappropriate chemical selection. Across American residential architecture, pest pressure shifts dynamically with seasonal weather transitions—such as winter frost line drops, spring thaws, and summer humidity spikes.
+-----------------------------------------------------------------------------------+
|                        TREATMENT FAILURE & RECURRENCE PIPELINE                    |
+-----------------------------------------------------------------------------------+
|  [ Unsealed Mechanical Chases ] ---> Allows Continuous Exterior Re-entry          |
|                                                                                   |
|  [ Elevating Wood Moisture ]    ---> Dilutes Active Residuals & Sustains Colony   |
|                                                                                   |
|  [ Repellent Aerosol Spraying ] ---> Causes Colony Splitting (Scatter Effect)      |
+-----------------------------------------------------------------------------------+
Key Architectural & Structural Root Causes
-
Slab-on-Grade Foundations & Cold Joints: In slab constructions, hairline expansion joints and plumbing penetrations beneath bath traps allow subterranean termites (Reticulitermes spp.) and commensal rodents (Mus musculus) to bypass perimeter soil or wall treatments.
-
Crawlspaces & Unsealed Basements: Crawlspaces lacking heavy 6-mil polyethylene vapor barriers sustain relative humidity above 70%. Excess moisture degrades chemical barrier stability and provides ideal hydration for surviving worker pests.
-
Cladding Termination Below Grade: Stucco or siding extending beneath the soil line creates sheltered pathways where pests travel behind protective shells, avoiding surface-applied contact termiticides or insecticides.
A failed treatment requires moving beyond simple re-spraying to conduct a comprehensive structural audit that identifies unsealed entry routes, hidden micro-habitats, and underlying moisture sources.
3. Seasonal Pest Prevention Framework
Sustained pest elimination relies on an ongoing Integrated Pest Management (IPM) routine designed to protect structural envelopes across seasonal shifts.
+-----------------------------------------------------------------------------------+
|                        SEASONAL MOISTURE & PEST MANAGEMENT                        |
+-----------------------------------------------------------------------------------+
|  SPRING/SUMMER           |  FALL/WINTER             |  YEAR-ROUND INTERIOR        |
|  - 18-24" Veg Buffer     |  - Seal Envelope         |  - Crawlspace RH <50%       |
|  - Extend Downspouts 5'+ |  - Manage Firewood       |  - Fix Micro-Leaks          |
|  - Maintain Soil Gap 6"+ |  - Clear Weep Holes      |  - Monitor Plumbing Chases  |
+-----------------------------------------------------------------------------------+
Fall/Winter Protocols
-
Exterior Building Envelope Sealing: Seal plumbing penetrations, electrical chases, and foundation cracks using durable copper mesh or stainless steel wool backed with exterior polyurethane sealant.
-
Cellulose & Firewood Storage: Elevate stored firewood at least 6 inches above soil level and maintain a 20-foot separation from structures. Clear cardboard boxes, scrap wood, and paper debris from basements and crawlspaces.
-
Weep Hole Shielding: Insert stainless steel mesh covers into brick veneer weep holes to maintain structural airflow while blocking pest entry.
Spring/Summer Protocols
-
Vegetation Clearance: Maintain an 18-to-24-inch cleared perimeter around foundation walls, trimming back shrubs, climbing vines, and mulch beds.
-
Drainage & Grade Management: Ensure topsoil slopes away from foundation walls at a minimum slope of 6 inches over 10 feet. Extend gutter downspouts at least 5 feet from the structure.
-
Siding-to-Soil Gap: Maintain a minimum 6-inch bare concrete gap between the bottom edge of siding (vinyl, wood, or stucco) and soil or mulch lines.
Year-Round Interior Habits
-
Relative Humidity Targets: Maintain basement and crawlspace relative humidity strictly below 50% using continuous dehumidifiers and vapor barriers to eliminate drinking water sources.
-
Plumbing Maintenance: Repair minor drips under sinks, around water heaters, and along HVAC condensate lines immediately.
-
Avoid Aerosol Spray Misuse: Never apply over-the-counter pyrethroid sprays directly to active pest galleries or entry paths; doing so scatters pests into uninspected wall voids.
4. Emergency Dispatch Matrix
| Emergency Scenario | Primary Structural & Health Risks | Immediate Action Required |
| Active Rodents in Living/Prep Zones | Food contamination (Salmonella, Leptospirosis); wiring fire hazards from chewed insulation; airborne pathogens (Hantavirus). | Isolate food supplies in glass or metal containers. Do not dry-sweep droppings. Call Best Home Pest Control at 937-809-8658 immediately. |
| Indoor Termite Alate Swarm | Active mature colony embedded inside structural framing; imminent risk of load-bearing wood destruction. | Do not use pyrethroid aerosol sprays. Vacuum emerging swarmers, save specimens in a jar for identification, and schedule an urgent inspection. |
| Interior Stinging Insect Nest | Structural drywall breakdown from nest moisture; risk of mass indoor stinging events and severe anaphylaxis. | Close off the affected room. Do not plug exterior exit gaps (forces yellowjackets to chew through interior drywall). Call for targeted dust extraction. |
| Severe Bed Bug Infestation | Rapid, hidden indoor colonization; severe sleep deprivation and secondary skin infections from scratching. | Do not move infested furniture between rooms. Vacuum seams, wash bedding in high heat, and contact a specialist for thermal or chemical remediation. |
5. Systematic 5-Step Professional Inspection Workflow
When standard pest control applications fail to achieve complete control, Best Home Pest Control executes a 5-step diagnostic audit:
+-----------------------------------------------------------------------------------+
|                        5-STEP DIAGNOSTIC WORKFLOW MATRIX                          |
+-----------------------------------------------------------------------------------+
|  [Step 1] Exterior Perimeter & Entry Point Mapping                                |
|     └─ Map utility penetrations, foundation cracks, grease rub marks, rooflines   |
|                                                                                   |
|  [Step 2] Interior Micro-Habitat & Moisture Analysis                               |
|     └─ Deploy FLIR thermal imaging, pinless moisture meters, and borescopes      |
|                                                                                   |
|  [Step 3] Species Identification & Population Density Staging                     |
|     └─ Confirm species genetics; evaluate colony maturity & harborage depth      |
|                                                                                   |
|  [Step 4] Custom Integrated Pest Management (IPM) Reformulation                  |
|     └─ Switch to non-repellent chemistries, chitin inhibitors, or mechanical exclusion|
|                                                                                   |
|  [Step 5] Targeted Application, Exclusion, & Ongoing Monitoring                   |
|     └─ Execute precision injection, install physical exclusion, and set follow-ups|
+-----------------------------------------------------------------------------------+
Step 1: Exterior Perimeter & Entry Point Mapping
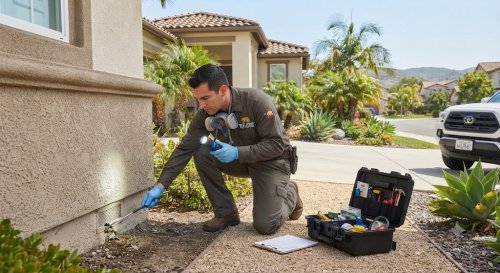
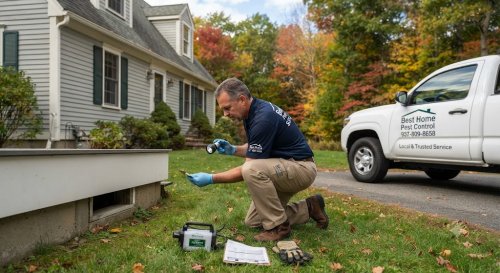
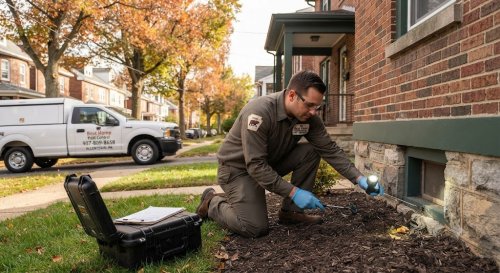
We perform a complete 360-degree re-inspection of the building envelope, checking for unsealed utility penetrations, foundation settling cracks, siding termination points, and grease rub marks along pest runways.
Step 2: Interior Micro-Habitat & Moisture Analysis
Technicians inspect hidden wall voids, crawlspaces, basements, and attic framing:
-
Deploying pinless moisture meters to detect damp framing ($>15\text{--}20\%$ Wood Moisture Content) that neutralizes active chemical residuals.
-
Utilizing FLIR thermal imaging cameras to locate thermal anomalies from hidden pest nests or concealed plumbing leaks.
Step 3: Species Identification & Population Density Staging
We collect specimens to verify exact species genetics:
-
Differentiating resistant strains or misidentified species (e.g., confusing subterranean termites with carpenter ants or Roof rats with Norway rats).
-
Sounding load-bearing timber and using fiber-optic digital borescopes to measure gallery depth and population density.
Step 4: Custom Integrated Pest Management (IPM) Reformulation
We adjust the treatment plan based on technical diagnostic data:
-
Replacing ineffective repellent chemistries with non-repellent transfer agents (e.g., fipronil, chlorfenapyr) or chitin synthesis inhibitor bait networks.
-
Pairing chemical controls with mandatory physical mechanical exclusion.
Step 5: Targeted Application, Exclusion Installation & Follow-Up Monitoring
-
Executing precision sub-slab drilling, perimeter trenching, or wall void foam injections.
-
Installing structural exclusions (copper mesh, high-grade polyurethane sealants) across identified entry points.
-
Setting perimeter monitoring stations and scheduling follow-up diagnostic re-inspections.
6. DIY Boundaries vs. Professional Interventions
| Safe DIY Homeowner Tasks | High-Risk / Pro-Only Interventions |
| Transferring pantry goods into sealed glass or metal food containers. | Large-scale attic or crawlspace decontamination and biohazard dropping cleanup. |
| Clearing leaf litter, firewood, and exterior debris 20+ feet from foundation walls. | Sealing elevated roofline entry points, soffits, and high ridge vents. |
| Installing standard rubber door sweeps on exterior entry doors. | Sub-slab concrete drilling and high-pressure chemical termiticide injections. |
| Operating interior dehumidifiers to maintain basement relative humidity <50%. | Full structural mechanical exclusion using copper mesh and polyurethane sealants. |
| Setting consumer snap traps along exposed room edges. | Wall void injection of non-repellent foams into active structural galleries. |
+-----------------------------------------------------------------------------------+
|                        4 MANDATORY PROFESSIONAL TRIGGER CONDITIONS                |
+-----------------------------------------------------------------------------------+
|  [Trigger 1] Daytime Pest Sightings in Primary Living or Food Prep Areas          |
|  [Trigger 2] Auditory Head-Banging, Chewing, or Wall Rustling Acoustics           |
|  [Trigger 3] Re-built Mud Shelter Tubes, Frass Deposits, or Chewed Cables         |
|  [Trigger 4] Unresolved Persistent Activity 14–21 Days Post-Treatment             |
+-----------------------------------------------------------------------------------+
7. Warning Signs: Sensory Diagnostics & Risks of Delay
Determining why a pest treatment failed requires evaluating distinct visual, auditory, and olfactory indicators:
+-----------------------------------------------------------------------------------+
|                           SENSORY DIAGNOSTIC MATRIX                               |
+-----------------------------------------------------------------------------------+
|  SENSE     | COMMENSAL RODENTS                   | WOOD-DESTROYING INSECTS        |
|  ----------+-------------------------------------+--------------------------------|
|  Auditory  | Rapid scampering, loud gnawing      | Soft clicking (soldier heads), |
|            | behind drywall late at night.       | papery rustling inside timber. |
|  ----------+-------------------------------------+--------------------------------|
|  Visual    | Dark droppings, grease rub marks,   | Fine wood frass, mud tubes,    |
|            | shredded insulation batts, gnaw marks.| shed swarmer wings, pinholes   |
|            | in drywall paint surfaces.           | in painted surfaces.           |
|  ----------+-------------------------------------+--------------------------------|
|  Olfactory | Sharp, pungent ammonia urine scent; | Mildewy, damp earth odor       |
|            | stale, musky nest odors.            | near packed mud galleries.     |
+-----------------------------------------------------------------------------------+
Sensory Indicators
-
Auditory Signals: Nocturnal scampering, loud gnawing, or scratching inside wall voids indicates rodent activity. Faint clicking or rustling inside structural timber points to soldier termites or carpenter ants.
-
Visual Signals: Persistent mud tubes on foundation walls, small sand-like frass piles under kick-out holes, or fresh rice-sized droppings in cabinets indicate an incomplete treatment barrier.
-
Olfactory Signals: Sharp, pungent ammonia odors signal active rodent urine deposits. A heavy, damp-earth smell near wall voids indicates active subterranean termite galleries filled with moist soil.
Risks of Delay
Allowing a failed treatment to go unaddressed leads to progressive structural and financial impacts:
-
Expanded Structural Damage: Unchecked termite or carpenter ant feeding weakens load-bearing joists, sill plates, and wall studs, causing sagging subfloors and drywall cracking.
-
Electrical Short Circuits: Rodents chew through wiring insulation inside wall cavities, exposing live wires and creating short-circuit fire hazards.
-
Insurance Exclusions: Standard homeowners insurance policies in the US explicitly exclude termite, insect, and rodent damage as preventable maintenance, placing all repair costs on the homeowner.
8. Cost Breakdown & Pricing Variables
Resolving a persistent or failed pest infestation involves specific inspection, treatment, and structural repair costs:
+-----------------------------------------------------------------------------------+
|                        COST & PRICING VARIABLE PROFILE                            |
+-----------------------------------------------------------------------------------+
|  Diagnostic Re-Inspection Fee  | $150 – $350 (Often credited toward treatment)    |
|  Perimeter Trenching/Injection | $8 – $18 per linear foot                         |
|  Sub-Slab Concrete Drilling    | $12 – $25 per linear foot                        |
|  Structural Mechanical Exclusion| $500 – $1,800 (Based on perimeter scope)         |
|  Annual Service Plan / Warranty| $250 – $450 per year (Includes re-inspections)   |
+-----------------------------------------------------------------------------------+
Key Drivers of Pricing:
-
Property Size & Accessibility: Foundation perimeter linear footage and complex architectural features (e.g., attached slab porches, finished basements) dictate required labor, concrete drilling, and material volume.
-
Treatment Reformulation: Transitioning from basic contact sprays to specialized non-repellent transfer chemistries (fipronil) or chitin synthesis inhibitor baiting networks involves higher initial material costs.
-
Mechanical Exclusion Scope: Sealing foundation gaps, soffits, and utility penetrations with copper mesh, sheet metal, and polyurethane sealants increases project labor.
-
Ongoing Maintenance Warranties: Annual renewal programs ($250–$450/year) cover periodic re-inspections and retreatments if pests reappear during the contract period.
9. Professional Equipment & Diagnostic Arsenal
| Diagnostic Tool / Technology | Technical Mechanism | Practical Application in Damage Differentiation |
| FLIR Thermal Imaging Camera | Detects minute surface temperature differentials ($\Delta T \ge 0.5^\circ\text{C}$) caused by heat signatures or moisture. | Identifies hidden moisture pockets, plumbing leaks, and active pest nest clusters behind sealed drywall. |
| Pinless Moisture Meters | Uses electromagnetic radio frequencies to measure Wood Moisture Content (%WMC). | Pinpoints structural framing with elevated moisture (>15–20% WMC) that neutralizes active chemical residuals. |
| Digital High-Definition Borescope | Uses a flexible 5.5mm fiber-optic cable with LED illumination passed through pilot holes. | Inspects internal wall voids and utility chases to confirm nest structures, chewed wires, and droppings without demolition. |
| Acoustic Emission Detector | Amplifies high-frequency acoustic stress waves (20 kHz–100 kHz) via piezoelectric sensors. | Detects minute acoustic vibrations produced by soldier termites head-banging and workers tearing cellulose. |
| Non-Repellent Transfer Chemistries | Utilizes undetectable active ingredients (fipronil, chlorfenapyr) that insects cannot sense. | Allows worker pests to travel through treated zones, pick up lethal doses, and transfer chemistry to the colony via grooming (trophallaxis). |
10. Industry Hard Truths & Insider Facts
-
Total-Release Bug Bombs / Foggers Fail: Consumer aerosol foggers deposit surface mists that do not penetrate wall voids or structural timber. Synthetic pyrethroids in foggers act as repellents, causing active pest colonies to scatter deeper into uninspected framing.
-
Ultrasonic Plug-In Repellers are Ineffective: Peer-reviewed research confirms ultrasonic plug-in devices do not deter insects or rodents. Pests adapt quickly to repetitive acoustic sound frequencies, ignoring them to reach food and harborage.
-
Chemical Applications Without Physical Exclusion Fail: Applying termiticides or insecticides while leaving foundation gaps, soffit voids, or plumbing leaks unresolved leads to treatment failure. Water leaches chemicals, and unsealed gaps allow ongoing re-entry.
-
The Insurance Reality: Over 95% of standard homeowners insurance policies in the US explicitly exclude termite, insect, and rodent damage, classifying pest management as preventable home maintenance.
11. Comprehensive FAQ Section
How long does it take for a professional pest control treatment to work?
Treatment timelines depend on the target pest and chemistry used. Non-repellent transfer chemistries and baiting systems typically eliminate subterranean termite or ant colonies within 60 to 90 days. Rodent exclusion and trapping programs generally achieve full control within 7 to 14 days.
Are professional pest control treatments safe for children and pets?
Yes, when applied by a licensed technician in accordance with EPA label directions. Liquid termiticides are injected beneath concrete slabs or trench-injected into perimeter subsoil below ground level. Interior baits and traps are placed inside locked, tamper-resistant enclosures.
How do I visually distinguish winged termites from swarming carpenter ants?
Check three physical characteristics:
-
Waist: Termites have a broad, uniform waist with no narrow pinch. Ants have a narrow, pinched waist (petiole).
-
Antennae: Termite antennae are straight and bead-like. Ant antennae are distinctly elbowed.
-
Wings: Termite swarmers have four wings of equal size and shape. Carpenter ants have front wings that are larger than their hind wings.
  TERMITE SWARMER                      CARPENTER ANT SWARMER
     \  ||  /  <- Straight Antennae       \  /  <- Elbowed Antennae
      \ || /                               \/
      (____)   <- Broad Waist            (  )   <- Pinched Waist
      (____)                             (  )
     / |  | \                            / || \
    /  |  |  \                          /  ||  \
   Equal Length Wings                 Unequal Wing Lengths
How should I prepare my home for a pest control re-inspection?
Provide clear physical access along perimeter foundation walls by moving stored boxes, furniture, and personal items at least 2 feet away from interior basement and garage walls. Outdoors, clear leaf litter, firewood, and thick vegetation away from the foundation line.
What causes the "flushing out" phenomenon after pest control treatments?
This effect occurs when non-repellent chemistries or precision dusts disrupt pest nesting harborage. Disoriented pests temporarily leave hiding spots in search of clean harborages, leading to a brief increase in visual sightings before total population elimination.
Why does standard expanding spray foam fail against rodent teeth?
Standard off-the-shelf polyurethane expanding foam cures into a soft, air-filled structure that rodent incisors easily chew through. Effective exclusion requires filling openings with stainless steel mesh or copper mesh before sealing with heavy polyurethane foam or caulk.
How often should a home undergo a professional pest inspection?
Homes should receive a professional pest inspection annually. Homes in heavily wooded areas or older neighborhoods benefit from bi-annual evaluations to catch foundation shifts and structural gaps early.
What are the main foundation attractants for subterranean termites?
Key attractants include direct soil-to-wood contact (such as wooden deck posts or door frames touching dirt), subterranean plumbing leaks near slab foundations, downspouts discharging water adjacent to foundation walls, wood mulch touching exterior siding, and unvented crawlspaces maintaining relative humidity levels above 70%.
Need Help Resolving a Failed Pest Treatment?
If a previous pest control application failed to solve your infestation, don't let structural damage or pest pressure escalate. Call Best Home Pest Control at 937-809-8658 to schedule a professional diagnostic audit today.